Thursday, September 08, 2011

Individual Page Flowchart


Welcome to News. I was divided task to design this news page and information. Keep it short; let's start my part.
At this News part, I was divide it into two part; one is Latest News and another one is Promotion. Latest News will consist of what happen and news on Pulau Payar, what are having maintenance and safety of Pulau Payar and last is Moonsoon season and Weather forecast. Beside that, Our promotion describe that what are the promotion or sales are available at Pulau Payar and what packages can be available for all tourists in Malaysia.

Tools used : 
  1. For the icon "News" is edit by Photoshop with the "adjustment - curves" to adjust the colour; 
  2. Use "Quick select tools" to cut the selected image and use "move tools" to move it to a new page with background transparent. 
  3. After that, use the "type tools" to key in the word [News] and change the colour to purple, then save the file with "png" to keep the background transparent.
  4. For the others image, i had use "adjustment - curves", "adjustment - Exposure" to adjust the color effects, use type tool to key in the text, "Spot Healing Brush Tool" to edit image.
For the Dreamweaver,change the title to "news". I change the link color by using page properties- Link and change the word color with "highlight the word and right click - font and add to new CSS rules - Double click on CSS style to edit the word", make the link with at the properties. Insert- media - SWF to add the flash into the page. Insert - form - text field/ text area/ check box to create the feedback form format and I insert the image with {Ctrl + Alt + I}.

Final Output

 Main Page

 News of Pulau Payar

Promotion of Pulau Payar

Friday, July 15, 2011

Retouching & Enhancing Digital

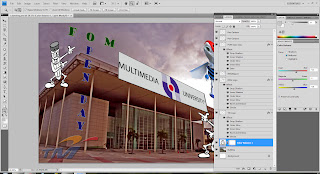
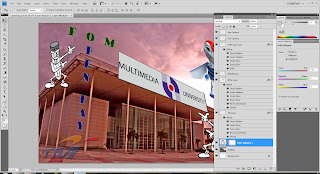
Until week 5 of this sememster, I was learn that how to do retouching & enhancing the photoshop. 
Here are the step & explaination to show below...

Step 1 : I was using tool to edit whole image of the adjustments,shadow & highlights. I make the adjustment of image more blur as my background, then I change shadow more brighter, and last i change highlight side more darker...
Image -> Adjustment -> Shadow/Hightlight 

 Step 2 : This step I was using the color balance to manual adjust the color. This time I was change Red color more on the side & feel on sun rise period. I was change everything as Midtone, Shadow & also Highlights
Adjustments -> Color Balance tool


Step 3 : I was using tool of reduce noice of the building area. The tool help me to reduce some blur & convert less dot point of the building.
Filter -> Noice -> Reduce Noice 

Step 4 : Lastly , I was using Sharpen tool to make it sharper of the building. It can make the image look more comfortable based on using Smart Sharpen.
Filter -> Sharpen -> Smart Sharpen

Thats all my retouching part...^^

Wednesday, July 06, 2011

Activities of Pulau Payar Marine Park

            There is no kayak and sail at near pulau payar. It is because of there are too much seashell and corals, so it cannot kayaking and sailing at these area.


             Other than these activities, Pulau Payar also provides many activities of tourists to visit. One of the activities is feeding the baby sharks. Tourists can have a close encounter with up to more than 20 black tip baby sharks and actually feed them at the Pulau Payar centre part. There usually the “shark caller” would call and start getting fed the baby sharks towards the beach by breaking little fishes and let some of the blood into the water. In the couple of minutes, tourist can see the first baby sharks will coming and circling in the middle of the crowd following by less than 10 depending on that day environment. But other meat-eating larger fishes would also follow for suit in the matter of seconds.
              If tourist are afraid of the tiny sharks; there got provide a jetty platform to get an overview of sharks or else tourist can just stand in the water for viewing feeding baby sharks without any movement and just make sure tourist bury the toes into the sand when shark arrive. It is because normally sharks won’t go for your legs but in water, toes will look like small fishes for sharks and they might try to catch it, so be careful of it. 


Sunday, July 03, 2011

Layering

I have to show my particular of layering assignment here....
Here come de starting...
Step 1 : I use the Drag Tool to my 1 of 5 picture to A4 size for layering as a background.

Step 2 : I try go use "Shift + Left Click Mouse" to enlarge the size of my background picture. Then I click "Enter" for clear vision.

Step 3 : I doing the duplicate layer for next step.

Step 4 : After duplicate, I have to change Normal to Color Dodge as more bright background.

Step 5 : I drag another of my 5 picture to it. & I do it by using "Ctrl + Click Mouse" to click all angle to change it syle.

Step 6 : I using "layer style" to change the TM logo style.

Step 7 : I drag the picture & shift the angle as a banner logo. (Repeat following step which is 5 & 6)

Step 8 : I use the "layer style" to design the layer of MMU logo.
 
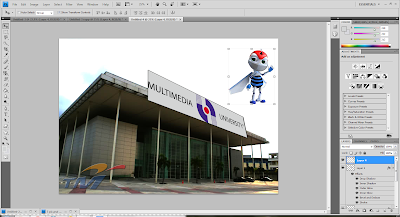
Step 9 : I Drag the Mascot to my A4 size.

Step 10 : I exchange the side of Mascot by using "Ctrl+ Left Click Mouse" to click angle to another side.

Step 11 :  I edit the Mascot by using Shift click Angle.


Step 12 : Clicking my words to my A4 paper.

Step 13 : I also using the same as above to edit the image. *Ctrl + Click Angle*

Lastly, It DONE!!! For my layering....

Thursday, June 23, 2011

My Tutorial 1 & 2

This is my 1st lesson of learning CS4^^
I had been learned some skills of PhotoShop CS4 
during my 1st & 2nd tutorial class, 
I'm creating a simply picture by using 2 simple steps 
which are  Lasso Tool, Quick Selection Tool and crop tool. 
 Lastly, I am using CS4 at my own computer....


Step 1 -- Use the "Rectangular Marquee Tool" to crop & cut it into my background picture.


Step 2 -- Use the "Horizontal Type Tool" to key in the word " Grand Hall @ MMU".


Tuesday, June 21, 2011

Introduction

My name is Tuen Jia Wei from BBA(Hons) Marketing with Multimedia.
 My Student ID is 1101109443. 
And Im from Ipoh, Perak Somewhere in Malysia....XD
I had my existing individual blog before so thats my 2nd blog...^^
Want know more about me can straight come find me chat..haha...
I just a simple normal person who like football....
Sure , I am glad that I had such opportunity to learn adobe photoshop, dreamweaver + flash...
^^